Best Camera Cubes for EDC Backpacks
Camera cubes turn any backpack into a photo bag. We break down protection levels, sizing, and the best inserts for different carrying styles.

You don't need a dedicated camera backpack. A good camera cube drops into any pack and gives you the same protection, better access, and way more flexibility when you're not shooting.
The advantage shows up the moment you stop treating photography as a separate activity. Throw a cube in your daily bag and you can shoot on the way to work, pull it out when you don't need it, or swap it between packs in ten seconds. Dedicated camera bags force you to commit. Cubes let you adapt.
But not all inserts are built the same. Cheap ones use thin foam that compresses under weight. Good ones maintain structure, protect glass, and still collapse flat when empty. Here's what actually matters.
Why Camera Cubes Beat Dedicated Camera Bags
Dedicated camera backpacks lock you into one use case. You carry a photo bag even when you're just grabbing lunch. Camera cubes give you options.
Pull the cube out and you have a normal backpack again. Swap it between your 20L daily carry and your 35L travel pack depending on the trip. Use two cubes if you're shooting an event and need fast lens changes. The modularity is the entire point.
We've also found that most camera backpacks sacrifice general carry features for photo-specific layouts. They have great divider systems but terrible laptop sleeves, poor water bottle access, or no quick-grab pockets. A good EDC pack with a cube inside gives you both.
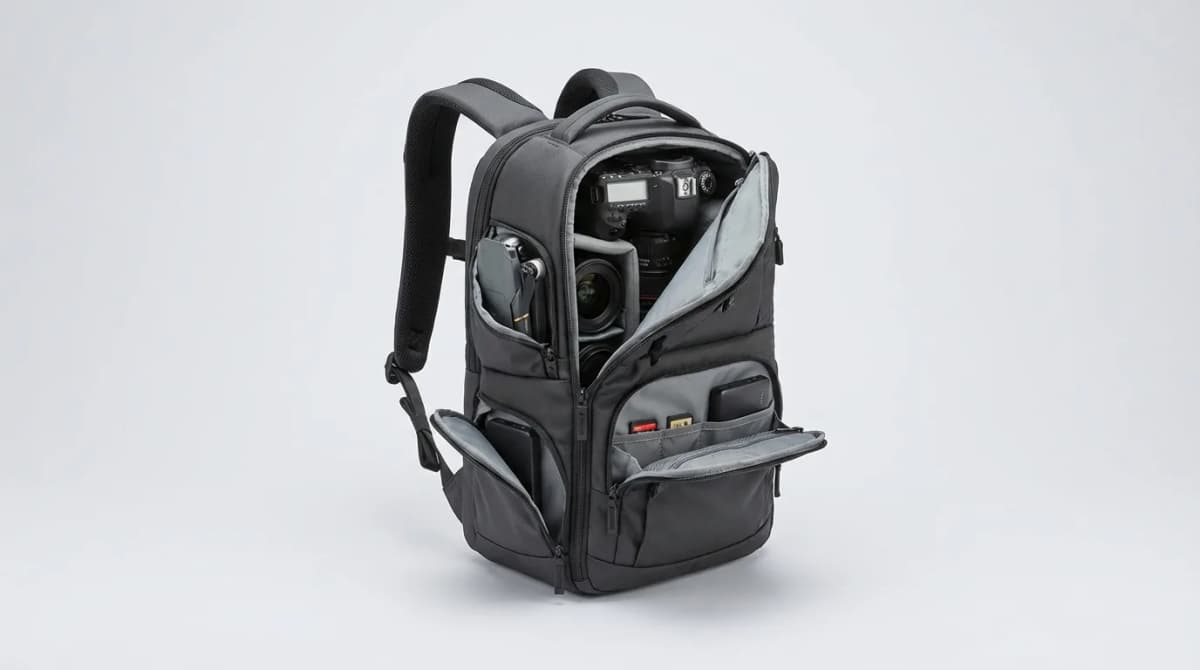
The other advantage is stealth. A Peak Design or Lowepro camera bag advertises expensive gear. A normal-looking backpack with a cube inside doesn't.

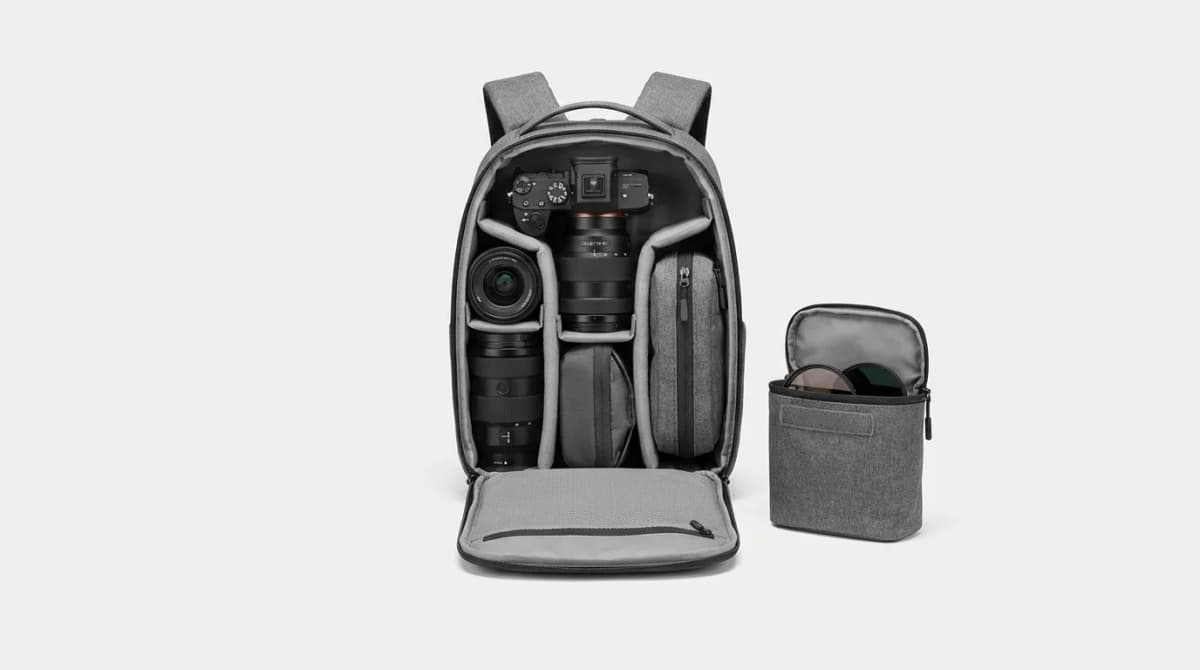
Peak Design Camera Cube Medium
See current price
Expandable design, weatherproof shell, origami-style dividers. Fits a body plus 3-4 lenses. Works perfectly with Peak Design packs but drops into any bag.
What Makes a Camera Cube Actually Protective
Foam thickness matters more than you'd think. Budget inserts use 5mm foam that bottoms out under a laptop or if you set the bag down hard. You want at least 10mm closed-cell foam on the sides and bottom, 8mm minimum on the lid.
The structure should hold shape when empty. If it collapses into a flat pile of fabric, it won't protect anything when full either. Good cubes use semi-rigid panels or dense foam that maintains form.
Dividers need to be repositionable but also stay put. Velcro strips should cover at least 60% of the divider edge. Anything less and they shift under weight or when you open the bag at an angle. We've had cheap cubes where dividers slide around in transit and lenses end up touching.
Zippers matter too. YKK #5 or larger, preferably with dual pulls. Small zippers bind when the cube is packed full. Lockable zipper pulls add security if you're traveling internationally.

Wandrd Camera Cube Pro
See current price
Heavy 12mm foam walls, TPU-coated weatherproof exterior, reinforced grab handle. Designed for Prvke bags but works standalone. Available in small, medium, and large.
Sizing a Camera Cube for Your Backpack
Most people go too big. A cube should fill 50-70% of your pack's main compartment, not 90%. You need room for a jacket, snacks, or a water bottle. If the cube takes over the entire bag, you've just built a worse camera backpack.
Measure your pack's internal dimensions first. Width and depth matter more than height because cameras sit horizontally. A 12-inch wide cube won't fit in an 11.5-inch bag no matter how you angle it.
Small cubes (around 7L-9L) hold a mirrorless body and 2-3 lenses. Medium (11L-14L) fits a DSLR or mirrorless with 4-5 lenses. Large (16L+) handles pro bodies with grips or multiple camera setups, but they're overkill unless you're shooting paid work.
Think about access too. Top-loading backpacks pair best with cubes that have clamshell or U-zip openings. Rear-panel access packs work better with cubes that open fully flat. Side access doesn't work well with cubes at all - you end up fishing around blind.

F-Stop Small Shallow ICU
See current price
Compact 8L insert, 10mm foam padding, fits Sony A7 plus three lenses. Low profile design works in slim daypacks. Modular attachment clips for F-Stop packs.
Hard Shell vs. Soft Cubes: The Tradeoff
Hard-shell cubes give maximum protection but kill pack flexibility. They don't compress when you're carrying less gear, and they add weight even when empty. Soft cubes with thick foam give 80% of the protection at half the weight and pack down when you don't need them.
The exception is air travel. Hard shells prevent crushing if your bag gets gate-checked or ends up under heavy luggage. For overhead bin carry-on, soft cubes are fine.
Semi-rigid designs split the difference. They use stiff panels in the base and back panel but keep the sides and top flexible. This prevents bottom-up impacts (setting the bag down hard) while still allowing some compression. We've found these work best for most people.
If you're shooting in rough conditions - adventure travel, event coverage where people are pushing through crowds, backcountry hiking - go rigid. If you're doing street photography, travel snapshots, or casual weekend shoots, soft is plenty.

Tenba BYOB 10 Camera Insert
$50
Ballistic nylon exterior, 10mm foam, removable shoulder strap converts it to a standalone bag. Fits full-frame DSLR and 3-4 lenses. Folds flat when empty.
Top Access vs. Clamshell Opening
Top-loading cubes work like a bucket. You see everything when you open the lid, but you have to unpack layers to reach the bottom. They're faster for single-camera setups where you grab the body and go. Less ideal if you need to swap lenses frequently.
Clamshell or U-zip designs open fully flat. You see the entire layout at once, grab any lens without moving others, and can repack quickly. The downside is they require more clearance to open. You need to pull the cube out of your bag or have a pack with a wide rear panel opening.
Hybrid designs with both top and side access give you options but add zipper weight and potential failure points. We'd rather have one well-executed opening than two mediocre ones.
For EDC carry where you're shooting intermittently throughout the day, clamshell wins. For dedicated photo sessions where you set up in one spot, top-loading is simpler.

Lowepro ProTactic Utility Bag 200 AW
$40
SlipLock attachment system, rigid base panel, all-weather cover included. Works as a camera insert or standalone pouch. Holds mirrorless body and 2-3 lenses.
Divider Systems That Actually Work
Velcro dividers are standard, but execution varies wildly. The best systems use hook velcro on the dividers and loop velcro covering the entire interior. This lets you position dividers anywhere, not just on predefined strips.
Dividers should be tall enough to separate lenses completely, not just create shallow compartments. A 24-70mm f/2.8 stands about 5 inches tall. Your dividers need to be at least that height or lenses lean into each other.
Origami-style folding dividers (Peak Design's approach) pack flatter but take longer to set up. Traditional padded dividers are faster to configure but don't collapse as small. Neither is wrong - it's about whether you reconfigure your layout constantly or set it once and leave it.
Some cubes include lens wraps or padded pouches instead of rigid dividers. These work for mirrorless setups with small primes but don't give enough structure for heavy zooms or pro glass.
Weather Resistance Features Worth Having
Most camera cubes are not waterproof - they're water-resistant at best. That's fine because they're inside your backpack, which should be your primary weather barrier.
Look for treated exterior fabrics (TPU coating, DWR finish) that shed splashes and brief rain. A waterproof bottom panel is more important than waterproof sides because that's what touches wet ground when you set the pack down.
Built-in rain covers are overkill for a cube that lives inside a bag. Save the weight. If you need weather protection, use a dry bag liner in your backpack instead.
The one exception is coastal or tropical shooting where salt spray and humidity are constant. Then a fully waterproof cube makes sense.

Think Tank Photo Stuff It Camera Cube
See current price
Lightweight design at 0.3 lbs, 8mm foam padding, attaches via Velcro strips to any surface. Available in small and medium. Great for minimalist travel setups.
Common Mistakes When Choosing Camera Cubes
Buying too big is mistake number one. Your cube shouldn't fill your entire pack unless you're building a dedicated camera bag. Leave room for non-photo gear.
Ignoring weight is mistake two. A large rigid cube can add 2-3 pounds before you put any gear in it. That matters if you're hiking or traveling light.
Not checking backpack compatibility is three. Some cubes are designed specifically for certain pack brands and won't work well in others. Measure first.
Overlooking grab handles is four. You'll pull this thing in and out of your bag constantly. Weak handles rip, and cubes without handles force you to grab fabric edges.
Assuming more dividers equals better is five. You need 2-4 dividers for most setups. Eight tiny dividers just means more pieces to lose and more weight.
Do You Actually Need a Branded Cube?
Generic camera cubes on Amazon cost $20-30. Branded options from Peak Design, Wandrd, or F-Stop run $60-100. The difference is foam quality, zipper durability, and design refinement.
Budget cubes work fine for occasional use or lightweight mirrorless gear. If you're carrying $5,000 worth of glass daily, spending $80 on a proper cube makes sense.
The middle ground is brands like Tenba, Think Tank, or Lowepro. They're less expensive than boutique options but still use quality materials and proven designs. We've beaten on Tenba inserts for years and they hold up.
Don't pay extra for brand-specific attachment systems unless you already own that brand's packs. Universal cubes give you more flexibility.

Amazon Basics Camera Bag Insert
$25
Budget option with 8mm foam padding, adjustable dividers, compact 10L size. No-frills protection for mirrorless setups. Good starter cube to test if you like the system.
Maintaining Your Camera Cube Long-Term
Foam compresses over time. After 2-3 years of heavy use, protection degrades. You'll notice dividers don't stay upright as well and the cube feels softer. Replace it.
Clean the interior every few months. Dust and debris accumulate in corners and under dividers. Use a damp cloth and let it air dry completely before packing gear back in.
Check velcro strips annually. They collect lint and lose grip. Pick out debris with tweezers or replace worn strips with adhesive-backed velcro from a fabric store.
Zippers need occasional maintenance. If they start catching, run a graphite pencil along the teeth or use zipper lubricant. Don't force stuck zippers - you'll break the pull tab.
Store cubes open and flat when not in use so foam keeps its shape. Leaving them compressed for months creates permanent creases.
Using Multiple Cubes for Different Kits
One cube for everyday carry, one for travel, one for client work. Pre-pack them and swap based on the shoot. This is faster than reconfiguring dividers constantly.
Keep a small cube in your car with a backup body and one zoom. You'll actually use it because it's always there.
Use cubes to organize by lens type rather than by camera. One cube for primes, one for zooms. Or one for wide angle through normal, another for telephoto. Makes packing intentional.
Color-code if you own multiple cubes. Different colored zippers or exterior fabrics help you grab the right one in a rush.
The system works because it's modular. You're not locked into one configuration.
Final Take
Camera cubes solve the flexibility problem that dedicated camera bags create. They let you carry photo gear in any pack, adjust your loadout daily, and keep your kit protected without committing to a single-purpose bag.
Start with a medium-sized soft cube that fits your most common lens setup. If you find yourself using it constantly, add a small cube for minimal days. If you need more capacity, go larger or add a second cube.
The goal is protection and access without giving up the versatility that makes EDC packs useful in the first place. A good cube disappears into your workflow instead of defining it.
The Weekly Dispatch
Enjoying this article?
Subscribe and get our best gear picks delivered every Sunday morning.
Related Stories
Best Camera Backpacks of 2026: Protect Your Gear
We tested 12 camera backpacks to find which ones actually protect your gear without destroying your back. Here's what separates the winners from the overpriced mistakes.
How to Pack Camera Gear Without Overpacking
Learn the lens strategy and packing techniques that let you travel light without missing shots. Real-world kit choices from working photographers.
Best Compact Camera Bags That Don't Look Like Camera Bags
Discreet camera bags protect your gear without advertising it. We break down padding, access speed, and which designs actually pass as regular bags.